Upload Widget
The Upload widget and the related Download Widget achieve complementary tasks.

By using the Upload Widget the end-users can upload a file to the AIMMS application, which can be further processed by the AIMMS model. This is very useful for applications which depend to a significant extent on input data provided by the users (e.g. an Excel file with a pre-determined template).
Warning
There is a hard-coded limit of 128 MB for upload files in the AIMMS Webserver component! In particular, exceeding this limit will result in an error while attempting to upload a file using the upload widget.
This limit can be changed (i.e. to a value lower than 128 MB) by adding (or adapting, if it already exists) a .conf file in you project settings folder (MainProject\WebUI\settings\webui-options.conf).
In this file you can set a value for the following option (here the limit of 128 MB is used, for illustration): webui.webuiserver.max-request-body-size 134217728.
Also, please be aware that there is a default upload time-out of 5 minutes (i.e. 300 seconds). This can be overruled in the .conf file, by adding or adapting the option webui.webuiserver.max-session-idle-seconds.
Some precaution should be taken in order to check whether your file can be uploaded within the specified time-out.
Creating an Upload Widget
After adding a new Upload widget to your WebUI page, you need to link it with an AIMMS procedure using the options editor of the Upload widget. This procedure needs to have three arguments in the exact way as below.
Procedure MyFirstUploadProc {
    Arguments: (FileLocation,StatusCode,StatusDescription);
    StringParameter FileLocation {
        Property: Input;
    }
    Parameter StatusCode {
        Property: Output;
    }
    StringParameter StatusDescription {
        Property: Output;
    }
}
Warning
The latter two (output) arguments should have the exact names shown above as they are treated in a special way in the underlying procedure call mechanism.
FileLocation
The upload widget always copies the file to be uploaded to a location depending on which AIMMS environment you are using. FileLocation contains the name of the uploaded file.
the root folder of the AIMMS project if in Developer mode
the temporary PRO folder, if the app is launched from a PRO server (or AIMMS Cloud)
However, to access this uploaded file with name FileLocation in the temporary PRO folder, you will need to know the path of that “PRO temporary” folder and append it before the file name. This can be done by using the pre-defined function webui::GetIOFilePath after assigning a string value to FileLocation.
webui::GetIOFilePath(FileLocation);
The above function returns a string value with the absolute path to the file FileLocation if you are using it from PRO and returns the unchanged file name if you are in Developer mode. By using this returned value as the location for the file you just uploaded, you will make it available for your model.
Note
In case you want to be able to download a previously uploaded file through the download widget, you can copy that file into the appropriate location. For this you can use the function FileCopy as shown below:
FileCopy(FileLocation, webui::GetIOFilePath(FileLocation));
StatusCode
The StatusCode argument should be filled in as follows:
statusCode := webui::ReturnStatusCode('OK');
The pre-defined function webui::ReturnStatusCode has as possible arguments the ones shown below:
OK
CREATED
BAD_REQUEST
UNAUTHORIZED
CONFLICT
ERROR
As your widget is expected to upload a file, the status OK is expected if all goes well. You can use one of the other status codes to signal that something went wrong when creating your file.
Note
Please note that these status codes are standard HTTP status codes. For further reference, please visit the following site https://en.wikipedia.org/wiki/List_of_HTTP_status_codes
StatusDescription
The StatusDescription argument can be used to display custom text as the status messages in the Upload widget.
Example
An example for the body of the Upload procedure is shown below. This particular example shows how to upload and read a text file. An example AIMMS project which illustrates the usage of this procedure can be downloaded from here.
! Using a block/on error construction guarantees that any unforeseen error is handled properly
block

     ! we store the location of the file in string parameter UploadLocation
     UploadLocation := webui::GetIOFilePath(FileLocation);

     ! reading the file UploadLocation into an string parameter
     sp_TextOfUploadedFile := FileRead(UploadLocation);

     ! checking if the previous read statement was successful or not
     if sp_TextOfUploadedFile <> '' then

         ! if successful, statusCode is set to 'OK' which will trigger the WebUI to show the message below in a grey box
         StatusCode := webui::ReturnStatusCode('OK');

         ! displaying the status message, and logging it in the WebUI messages
         StatusDescription := "File was uploaded and read successfully";

     else
         raise error "Something wrong";
     endif;

 onerror err do

     ! setting the statusCode to 'ERROR'
     statusCode := webui::ReturnStatusCode('ERROR');

     !displaying a custom error message
     statusDescription := "Could not read the file or the file is empty.";

     errh::MarkAsHandled(err);

endblock;
When executed through the upload widget, this procedure will let you upload a file at UploadLocation and read it in a string parameter sp_TextOfUploadedFile.
The name of the uploaded file will be appended with a random “big” number, to be sure to not overwrite any other file on the server. If you’ve uploaded “MyExcel.xlsx”, the uploaded file name could be “MyExcel-1564733452728.xlsx”.
If launched from PRO, the file name will still remain the same but the value for UploadLocation will be “temporary PRO path + MyExcel-1564733452728.xlsx”.
Note that this uploaded file is NOT automatically deleted if you are running WebUI in AIMMS Developer mode. If you want to delete this file after an upload, you should use the function FileDelete as shown below:
FileDelete(UploadLocation)
This step is not required on PRO as the temporary PRO folder in which the file is created will be automatically deleted sometime after the session is ended.
Tip
If you need to use folder names in your model, use forward slashes to separate them. This ensures that your project will be able to be executed on a Linux server.
Miscellaneous
In the Miscellaneous tab of the Upload widget’s options editor, other options may be set that are explained below:
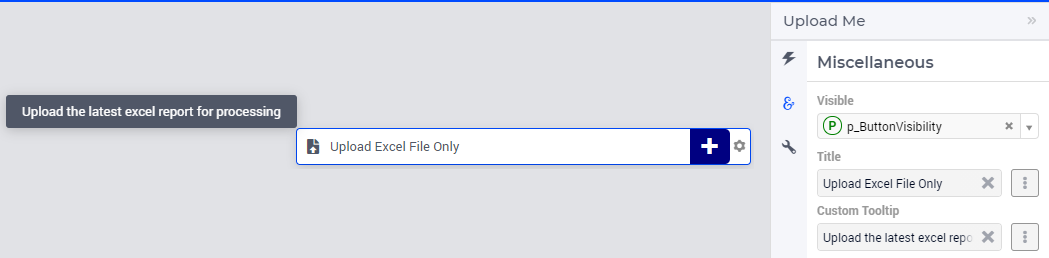
Visibility
You can control the visibility of the upload widget by either specifying a literal value 1 (visible) or 0 (hidden) or a binary parameter.
Title
Set the display text on the upload widget here. By default, the text that is displayed is “Upload File”. You can specify either a literal value like “Upload Excel File Only” or a string parameter.

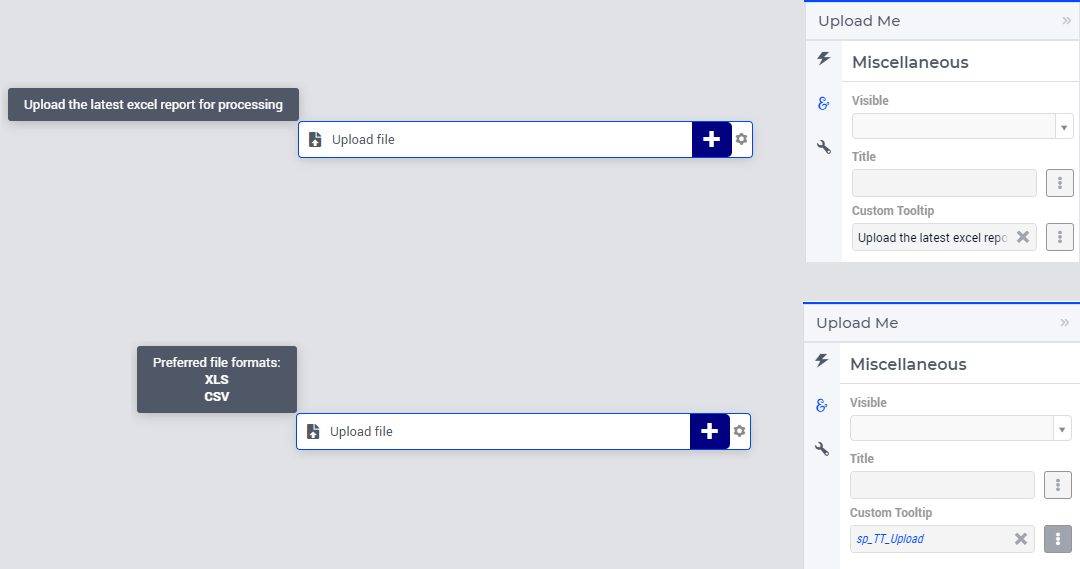
Custom Tooltip
You can specify a custom tooltip to display more information when the user hovers over a respective button. You can specify either a literal value like “Upload the latest excel report for processing” or a string parameter.
The content for the string parameter can be data driven and also supports HTML.
As illustrated below, the definition of string parameter sp_TT_Upload used to specify the Custom Tooltip option.
formatstring("Preferred file formats: <br><strong> XLS </strong><br><strong> CSV </strong>");
Alternative to the Upload Widget
Important
webui::RequestFileUpload declared in the WebUI Library.webui::RequestFilesUpload, also declared in the WebUI Library.