Text Widget
With the Text Widget, you can show text in the WebUI, style it, insert images in between and around it and let the text or images link to other pages, both internal and external.
An example of what a text widget could look like can be seen below:

Widget menu
When in edit mode, the menu of the text widget offers a number of functions as shown below:

From left to right, the buttons can be used to change font size, to make text bold, italic, underlined, strikethrough and/or colored, to change the background color of a piece of text, to create links, to insert images, to create lists and bullet points and to change text alignment.
Important
Starting from WebUI version 24.11, the menu of the text widget offers more functions than those illustrated in the picture above. Please scroll down towards the end of this section for the description of the additional functions included in the latest WebUI versions.
Inserting images
Firstly, the image must be placed into the WebUI/resources/images sub-folder of your MainProject directory. To insert an image, click on the ‘Image’ button  and copy the complete image name (including the image type/file extension) into the box that pops up. If done correctly, you should be able to see a preview of the image. Then click ‘Insert’ to insert the image into the text box.
Note
Please keep in mind that on Linux the casing of the image files should be correct, otherwise your images will not display. Also, please remember to specify the full name of the image, including the filename extension (like .jpg, .png etc). In particular, this is important to keep in mind in case your Windows Explorer is set to hide file extensions.
Creating links
In a Text Widget it is possible to add links to internal pages or to external URL pages.
To create a link within a text widget, select the part of the text or an image you want to make a link out of and press the ‘Link’  button.
For creating a link to another (internal) page within your WebUI app, type ‘/[AIMMS project name]/[Page name]’ (for example ‘/Text App/Welcome Page’, if you want to link to a page named ‘Welcome Page’ inside an app called ‘Text App’) into the box that pops up and click ‘Done’.
If you want to create a link to an external URL page, simply paste the external page’s URL into the box.
Since AIMMS 4.90, it is also possible to provide ‘mailto:’ links. Proceed as above, but instead of a URL simply specify ‘mailto:person@organization.xx’. You can also specify more details, by extending this to, for example, ‘mailto:person@organization.xx?subject=test&body=test’. By clicking on such a link, your default mail program will open with an e-mail pre-filled according to your link parameters.
To change or remove a link, move your cursor to the left or right of the link and follow the menu that pops up.
Lastly, to exit the text widget’s editing mode, click the  in the top right of the text box.
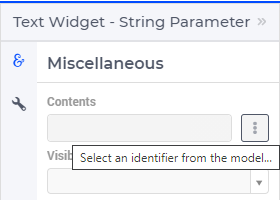
Specifying a string parameter in Contents
Important
String parameter in contents is available in software versions from AIMMS 4.79 onwards.
You can specify a string parameter in the contents to display text that changes based on either the current page or some other condition. This is very similar to specifying a string parameter in a scalar widget with the multi-line option, but with the advantage of using HTML content. This allows you to style the text, add images, hyperlinks, and a lot of other options that come with HTML formatting.
Note
The text widget is a rich text editor and does not support the complete list of tags or styles that an HTML document would provide. For example, the text widget does not support the <table> tag, meaning you cannot add tables to the HTML you wish to include in the text widget. The rich text editor will support any text formatting and some basic HTML styles.
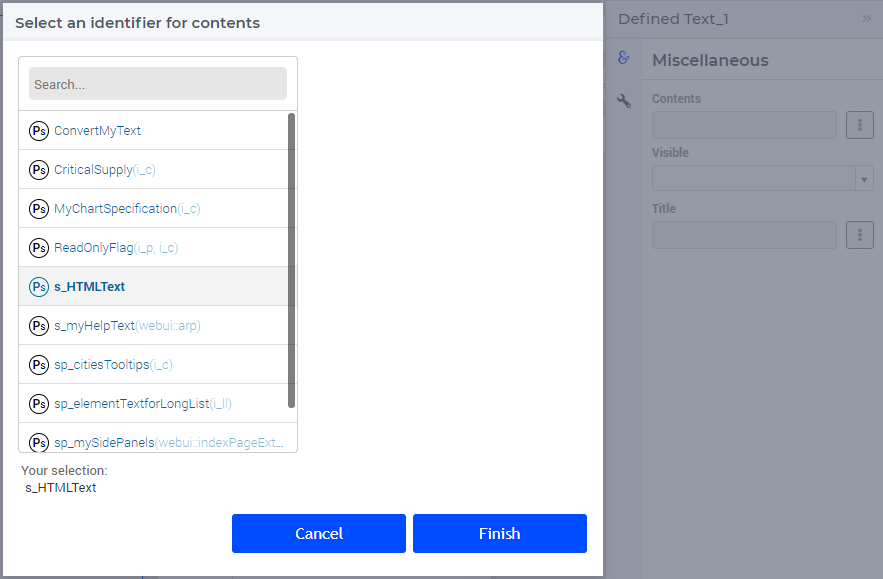
You can add a string parameter by opening the Identifier Selector by clicking the button next to the contents field and selecting the identifier you want to specify as the contents.
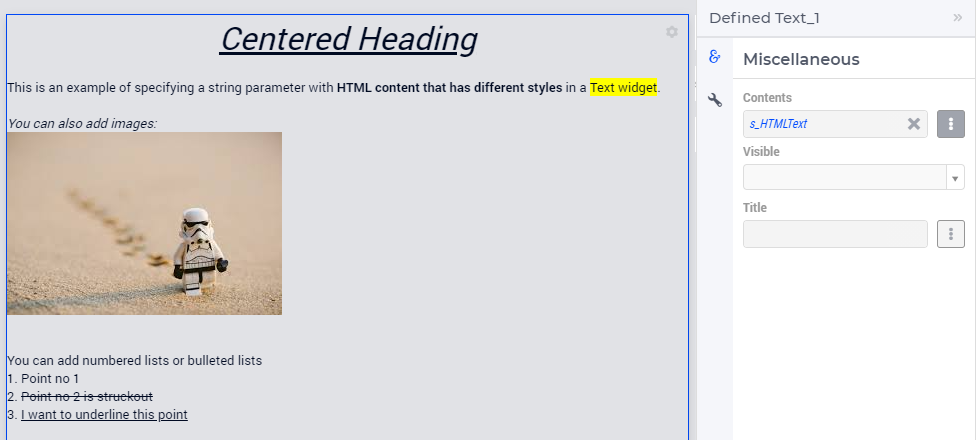
Specifying the string parameter s_HTMLText with the below data will result in a text widget as shown underneath:
"<div style=\"text-align: center;\"><span style=\"font-size: 32px;\"><u><i>Centered Heading</i></u></span></div><div><br></div>"
"<div>This is an example of specifying a string parameter with <b>HTML content that has different styles </b>in a"
"<span style=\"background-color: rgb(255, 255, 0);\">Text widget</span>. </div><div><br></div><div><i>You can also add images:</i></div>"
"<div><img src=\"/app-resources/resources/images/SmallImage.jpg\"></div><div style=\"text-align: center;\"><br></div><div><br></div>"
"<div>You can add numbered lists or bulleted lists</div><ol><li>Point no 1</li><li><s>Point no 2 is struckout</s></li>"
"<li><u>I want to underline this point</u></li></ol>" ;
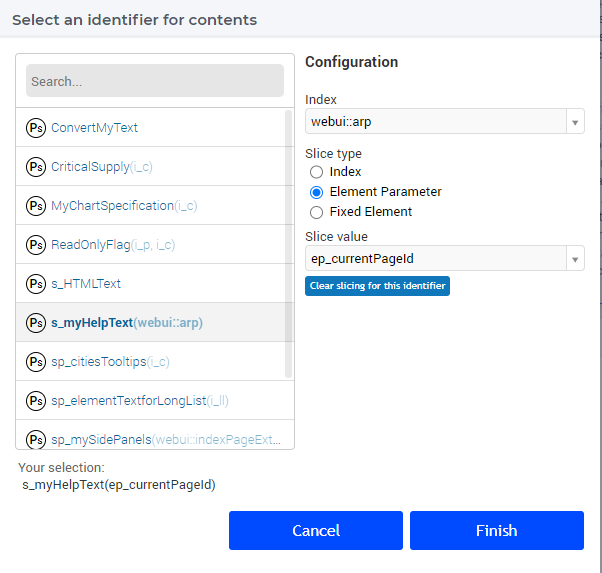
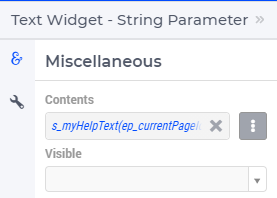
The Text widget supports a scalar string or a scalar slice of an indexed string parameter, as illustrated below. The string parameter s_myHelpText(webui::arp) is sliced over the element parameter ep_currentPageId ranged over the webui::AllPageIds.
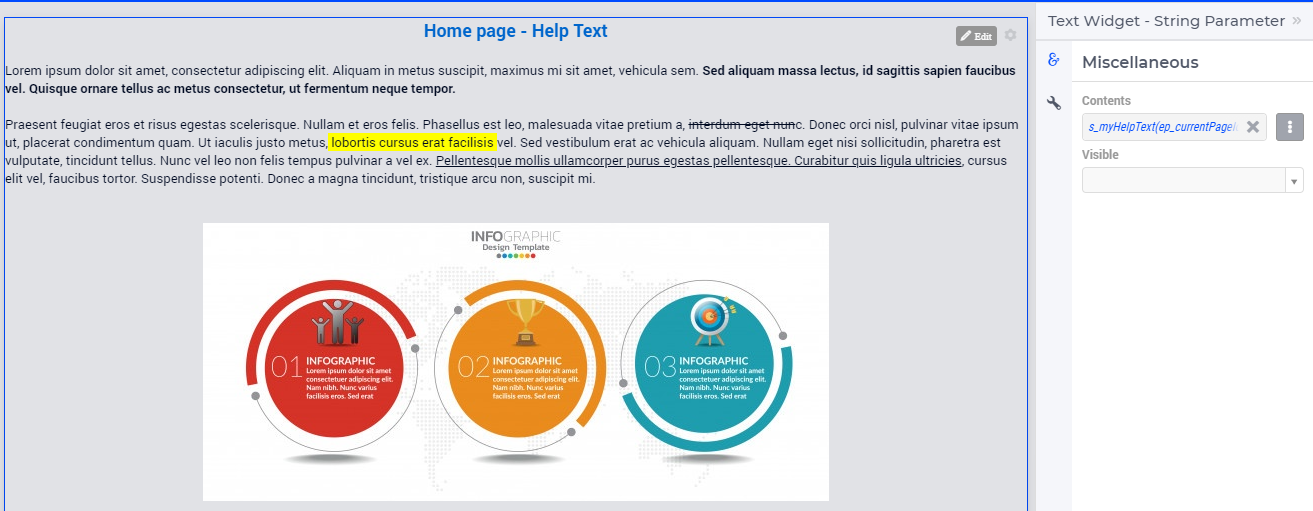
You can edit the contents of the string parameter by clicking on the edit button. After making the edits either click on the Save and Close “x” icon, or click the save icon.

When you have added content as a “Definition” to the string parameter, you will not be able to edit the content in the WebUI. The Edit button will be disabled.
Note
When reading from a file or adding HTML content to the string parameter ensure that the quotes used in style tags are escaped e.g., \".
When reading from a file and defining content for the string parameter, we strongly recommend you set NoSave to the Property attribute. This will ensure that the text is not stored in the case files, which would unnecessarily increase the size of the case file.
Functionality updates of the Text Widget Editor
Starting from WebUI version 24.11, besides the functions already discussed above, the menu of the text widget offers additional functions as illustrated in the following picture:

The functions already discussed above work in the same way with this new editor as well. Below we discuss further the additional functions offered by the latest WebUI version.
The functions H1, H2, H3, H4, H5, and H6 allow to insert text headers of different sizes:

The functions Blockquote and the Code Block are denoted in the editor menu by the icon with double quotes " and by the icon with </>, respectively:

The function Check List allows to insert a list of items along with their checkboxes:

The last four functions before the Save icon offer support for Left Indent, Right Indent, Sub-index, and Super-index, respectively:
